Wednesday, February 10, 2010

Baby Projects!

With the baby arriving at the beginning of March, I have been very busy making all sorts of baby items!


One of the first items I made was a quilt for Our baby! It came out really cute. A little background info first! My husband was born and raised in the south. He is always wearing a shirt that says something about the south. He has also been in the army for almost 10 years. The quilt is composed of 9 squares. Four of the squares are made out of his old army uniforms. All I did was cut the back away and used random sized strips. It is made out of ACUs, BDUs, and DCUs. The other 5 squares are from my husband's t-shirt stash. I think it came out to be a good size. At first I think it will just be something for the baby to lay on while we play!


The second item was a baby rag quilt! I had gone to TARGET over Christmas time and was wondering around the baby section. They had several different receiving blankets on clearance. I picked out a cute 3 pack and knew right away that I was going to use them for a rag quilt! The blankets were each a 1 yard square. So the blanket is composed of 6 yards of fabric. The top is the receiving blankets and the back is just a brown flannel. I used 99, 6 inch squares.


The third thing I made is the Wee Wee Wigwam from Make it and love it! I will post a link at the bottom of the page! These are super cute and super easy. They went together in about 3 minutes for each one! I used the left over squares I had from the rag quilt!


The next items weren't for me to keep but for my brother to give as a gift to one of his friends who just recently had a baby. He wanted a few bibs and burpcloths. He really thought that I should make one pair in Camouflage and the others really didn't matter. Just boy prints. And we also made a tag blanket and it came out really cute too!


I have made even more baby stuff but that will have to be in a different post. We are in the middle of getting ready to move and I still need to finish the rest of our baby bedding. It is camoflauge, with touches of orange! Very boyish! I still have the bumper pad to go and a pad for the back of my glider.

Wednesday, January 20, 2010

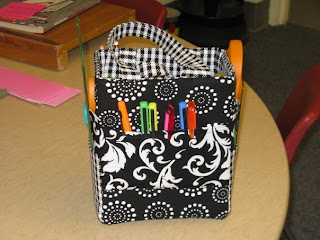
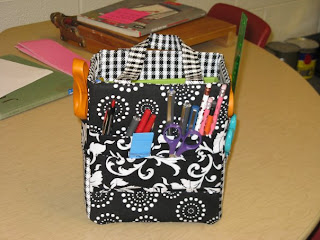
Another Art Tote

I love this Art Tote pattern! I wrote a review of it in a previous post!


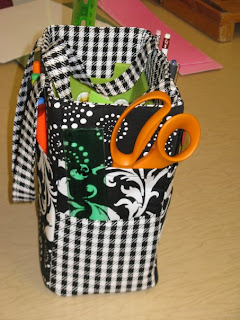
I ended up keeping the first one that I made. I keep my sewing stuff in it! Scissors fit great in the side pockets, and my patterns fit nicely inside. Seam rippers, small scissors, and seam gauges don't get lost when they are in the small outside pockets.


I made a second one for my mom! She teaches 3rd grade and aways has a ton of pens and highlighters on her desk. So I thought maybe this would help keep her desk more organized.

She says she loves it because it is so sturdy and that now she knows where to find all of her stuff. She keeps glue sticks and scissors on the inside so that her students can just come up and know where to find the stuff!


I bought this pattern from an ETSY shop but I am pretty sure they don't sell it there anymore. It is now on You Can Make This Dot com! The awesome thing about this pattern is that it is only $6 and you can make them and sell them!

Tuesday, January 19, 2010

Bridesmaids Gifts


I have been working on custom orders! I have a family member getting married in a couple of months and his bride-to-be wanted handmade gifts!


She wanted their wedding colors to be involved. Lime green, black, and purple are really hard to find all in one print. I personally think purple is hard to find period. Alice Kennedy has a great line of Black and Lime green prints! I bought 6 half-yards and cute 2 1/2 inch strips and sewed them together used those for the tops of the bag and then used IKEA solids for the bottom!


They came together very quick and I think they are adorable! The bags went out in the mail today and I hope that when the bridesmaids receive them they love them just as much as I do!

Jewelry Rolls!


I just finished making 4 Jewelry rolls and I love each and everyone of them! The pattern I use is my own and I really want to write a tutorial for it! I don't know when I will ever find time to do that though!


I seem to always forget to take pictures during the sewing process! I also would have to type out directions and I am not sure if they would make sence to anyone but me!


These are for bridesmaids gifts! This is the second set of jewerly rolls that I have made for bridesmaids! I hope everyone loves them!

Wednesday, January 6, 2010

Acu Custom Orders!

These are pictures of the 2 most recent custom orders I have finished!

I have made several ACU purses in the past and I always love the turn out! I like using solid lining! It seems to give the most contrast to the ACU print!


Tuesday, December 29, 2009

Christmas Pin Wheel Table Runner

This is the first time I have ever done pin wheels and even though not all of the points match up I think it is very cute!


I used some Moda Figgy Pudding Fabric for the pin wheels and a cheap white on white print that I got from wal-mart for the front. The backing fabric is from Hobby Lobby. It is a super cute brown and blue Christmas print. I got it half off because I bought it so close to Christmas time!

I got the idea from the blog Pleasant Home and also used their tutorial for Prairie points. I love the points. They are very easy and so cute!

Sunday, December 20, 2009

Cold Feet!

Well, yesterday at 5:30 am the snow started. It didn't stop until about 8 this morning. Twenty Four inches of the white stuff fell over one day. So, Yes I do have cold feet but that is just because we went out and shoveled for quite awhile this morning. We are supposed to be on our way to Florida right now but Mother Nature had other plans for us.
Here is a tutorial on how to cure those cold feet issues!
http://www.vanessachristenson.com/2009/02/tutorialrice-bag-feet-warmer.html
This tutorial is so easy and so warm! I how ever made one small change to the first one that I made. I use feed corn in mine instead of the rice. I have been told that it retains the heat better. I warm mine in the microwave for 3 minutes on high and out come a bag that is nice and toasty!
I have also made these in a few other sizes. They come out great no matte what!